On this page
You need a flyer by tomorrow, and Microsoft Word is already on your computer. Good news: you can make a flyer in Word that looks clean and prints the way it looks on screen. The bad news is that Word was built for letters and reports, and a few of its default settings quietly ruin flyers.
The page color vanishes when you print. Photos come out soft. Text boxes jump when you add a line. None of that is your fault, and all of it is fixable in a few clicks.
This guide gives you both routes, from a template and from a blank page, with the exact menu names for Windows and Mac. Then it covers the three print traps most Word guides skip. By the end, you'll have a flyer you can print this afternoon that people can read from across the room.
How to make a flyer in Word: the short version
To make a flyer in Word, go to File, New, search "flyer" and pick a template, or start a blank document. Set the page to Letter (8.5 x 11 inches), add a big headline, one picture and short details in text boxes, then turn on background printing and save it as a PDF before printing.
- Plan the flyer: one goal, one headline, one call to action
- Start from a template, or set up a blank page
- Set the size and margins
- Add the headline and details in text boxes
- Add a picture and a color block
- Add the call to action and contact details
- Fix the three print traps
- Save as a PDF and print
Step 1: Plan the flyer before you open Word
Five minutes on paper saves an hour of nudging boxes. Write down four things: the one thing you want people to do, a headline of under about eight words, three short details (what, when, where), and how to reach you.
Here's the example we'll carry through this guide. The Oak Hill Community Yard Sale is a made-up neighborhood event. Its goal is simple: get people to show up on Saturday morning with cash.
- Headline: Oak Hill Community Yard Sale
- Details: Saturday, May 9, 8am to 1pm. 30+ families, one street. Furniture, toys, books, tools.
- Call to action: Bring cash and a bag
- Where: Oak Hill Drive, between 3rd and 5th
If you can't fit your flyer into four lines like these, it's trying to do too much. Cut until it fits.
Step 2: Start from a template, or open a blank page
Path A: start from a Word template. This is the fastest route if a template is close to what you want. In desktop Word, go to File, then New. Type "flyer" into the Search for online templates box and press Enter, then pick a design and select Create. Microsoft's guide to creating a document in Word shows the same File, New screen.
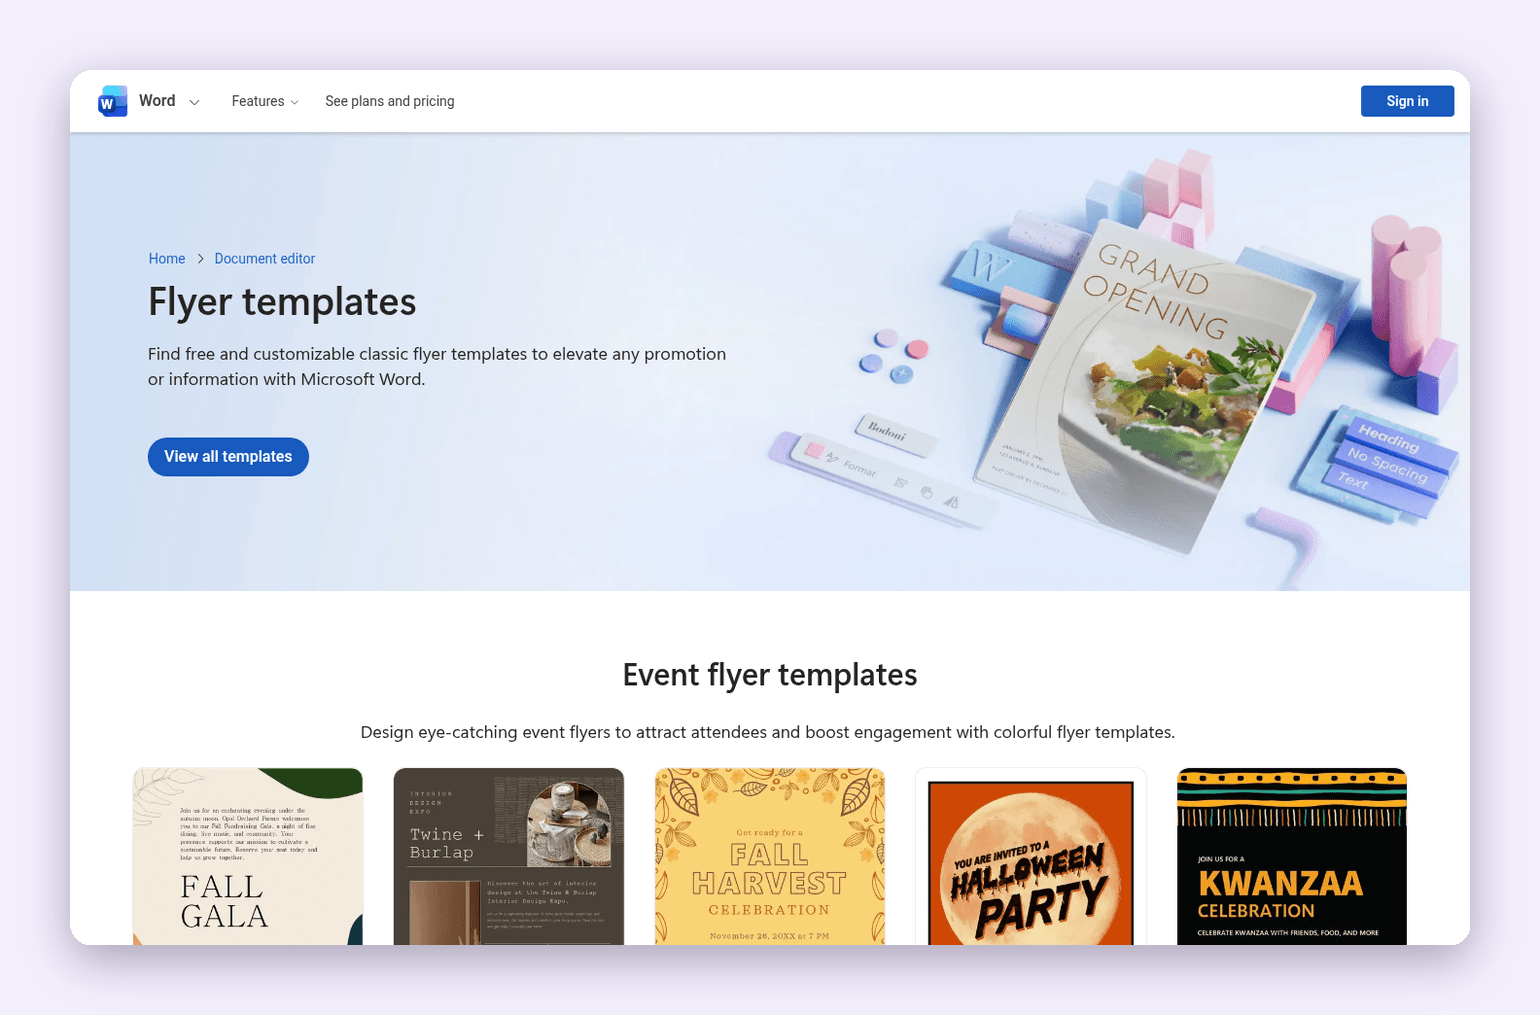
Once it opens, click each placeholder and type your own words. To replace a sample photo, select it, go to Picture Format and choose Change Picture, so the new photo keeps the old one's size and position. Delete any box you don't need rather than leaving it empty, because empty boxes still print as odd gaps.
One check before you go further: many templates are built for a specific paper size. Look at Layout, then Size, and make sure it says Letter if you're printing in the US.
Path B: start from a blank page. Pick Blank document from File, New. This takes longer but gives you full control, and you'll never fight a template's hidden layout. The rest of this guide follows Path B, but every step works on a template too. Coming to Word because Microsoft retired Publisher in October 2026? Our guide to Microsoft Publisher alternatives covers what to do with your old .pub files.
Step 3: Set the page size and margins
US flyers are almost always Letter, 8.5 x 11 inches, which is also Word's default page in the US. Our flyer size guide lists A4, A5 and half-page sizes if you need something else.
On Windows: go to Layout, then Size, and pick Letter. For a size that isn't listed, choose More Paper Sizes and type the width and height.
On a Mac: go to File, then Page Setup, and choose the paper size there. For a custom size, open the Paper Size list and choose Manage Custom Sizes.
Now the margins. Go to Layout, then Margins, then Custom Margins, and set all four sides to 0.5 inch. Microsoft's page on creating custom margins shows the same steps for Windows, Mac and Word for the web. A half-inch margin keeps your words away from the edge, where home printers can't reach and print shops trim.
Step 4: Add the headline and details in text boxes
Don't type straight onto the page. Text typed in the body moves every time you add a line above it. Text boxes stay where you put them.
Go to Insert, then Text Box, then Draw Text Box. Drag a wide box across the top of the page and type your headline. Make it big: 48 to 72 pt in a bold, plain font reads from across a room. To hide the box outline, select the box border, then go to Shape Format, then Shape Outline, and choose No Outline.
Draw a second text box below for the details. Use 16 to 20 pt and keep it to three short lines. Left-aligned text is easier to read than centered text once you go past two lines.
Step 5: Add a picture and a color block
Go to Insert, then Pictures, and choose a photo from your computer. Select the picture, click the Layout Options button next to it and choose any option other than In Line with Text, such as Square or In Front of Text. Now you can drag it anywhere. Microsoft explains each option in its guide to wrapping text around a picture.
Resize photos by dragging a corner handle, never a side handle. Side handles stretch faces and products, and nothing looks more homemade.
For a bold color block behind your headline, go to Insert, then Shapes, and draw a rectangle. Fill it with your color, then go to Shape Format, then Wrap Text, and choose Behind Text, so your words sit on top. Pick one strong color and one dark color for text. Two colors look designed. Five look like a ransom note.
Step 6: Add the call to action and contact details
Your call to action is the line that makes the flyer pay off. Put it in its own text box near the bottom, in your strong color or on the color block: "Bring cash and a bag," "Call to book," "Scan for the menu."
Under it, add the address, phone number or website. If you add a QR code, make it at least about 0.8 inches square, keep clear space around it and scan it from a printed test. Our guide to adding a QR code to a flyer covers the size and placement rules.
Here's the finished Oak Hill flyer. It follows every rule above: one headline, one date line, one call to action and three short details.
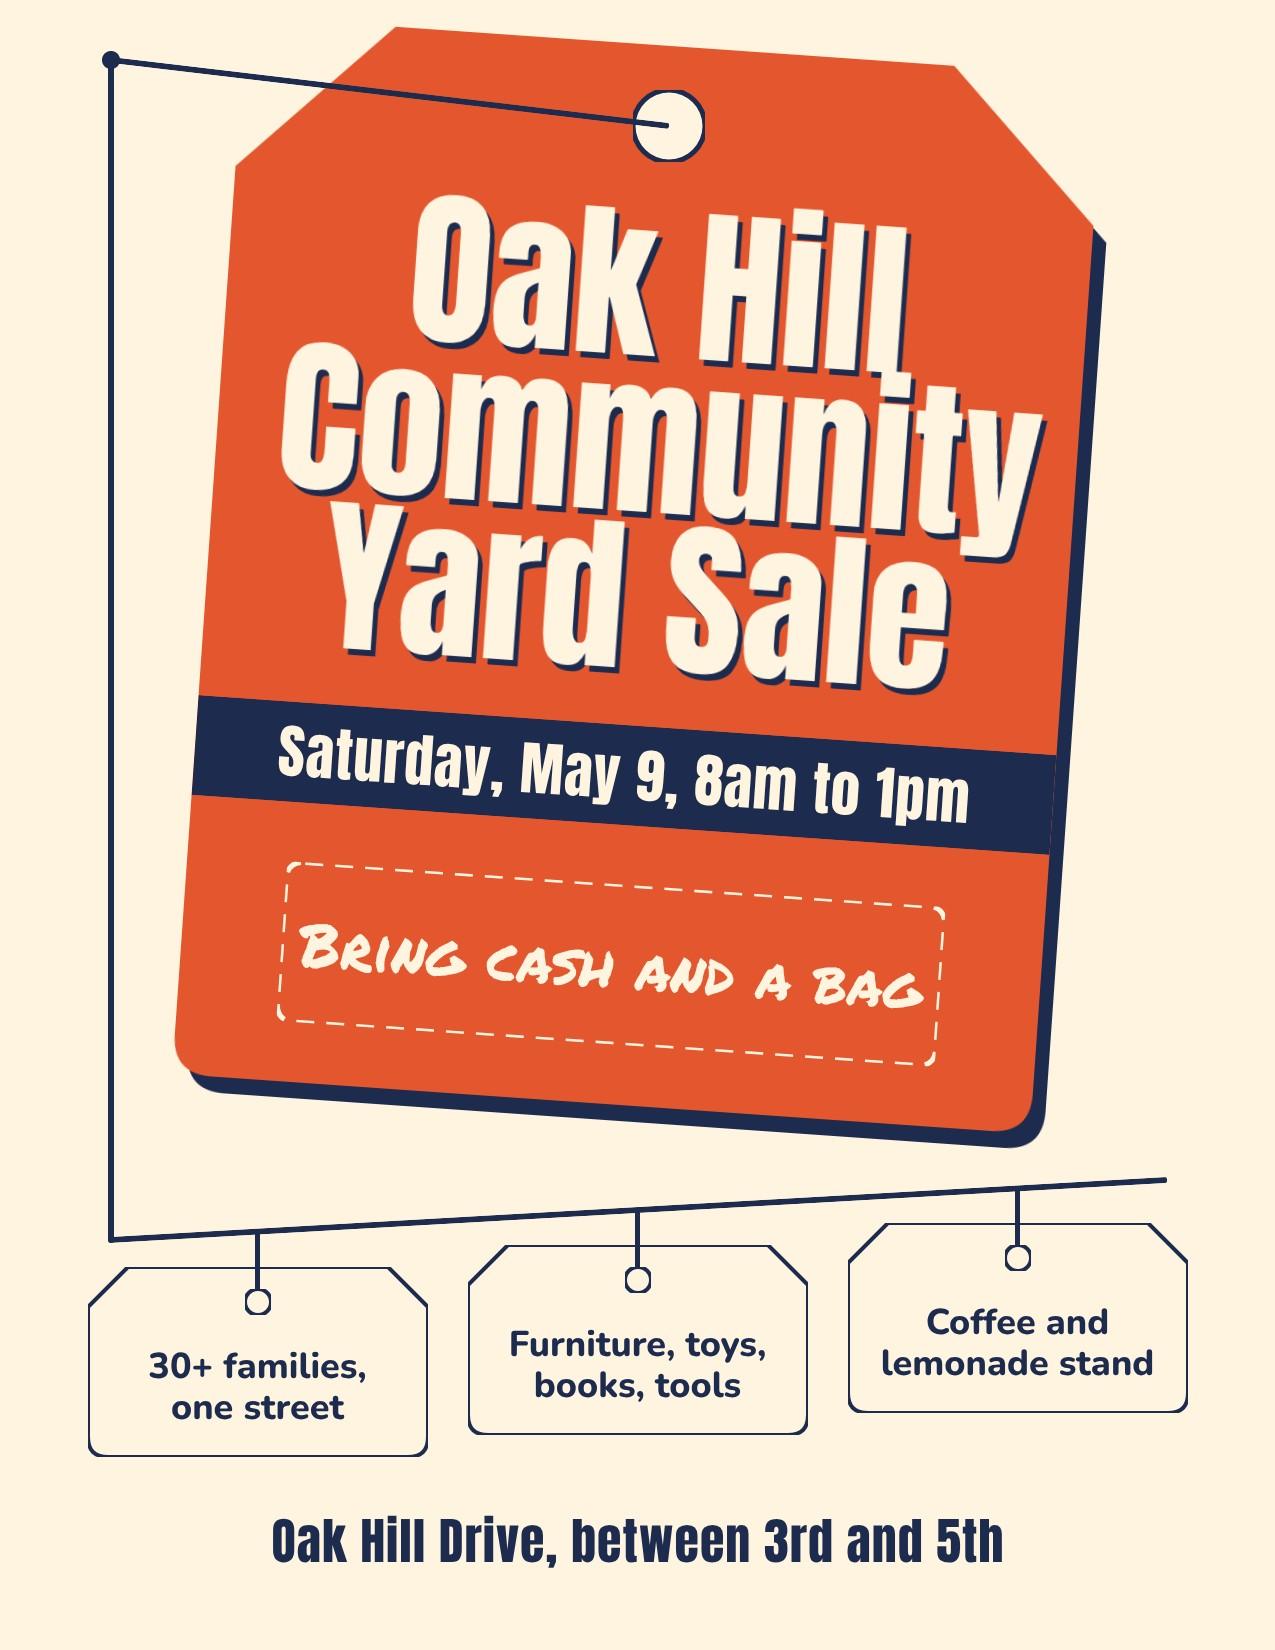
You can build this exact layout in Word with two text boxes, a rotated rectangle and three small rounded rectangles. This version was made in Krumzi from a one-paragraph description, which we'll come back to later.
Step 7: Fix the three print traps
This is where most Word flyers go wrong, and almost no tutorial mentions it.
Trap 1: the background color doesn't print. If you colored the page with Design, then Page Color, Word leaves it off the printout by default. On Windows, go to File, then Options, then Display, and under Printing Options select Print background colors and images. On a Mac, go to Word, then Preferences, then Print, and select the same check box. Microsoft documents both paths on its print background color or image page.
Trap 2: your photos print soft. Word compresses pictures to keep files small. For a flyer, turn that off. Go to File, then Options, then Advanced. Under Image Size and Quality, select Do not compress images in file. Microsoft's guide to turning off picture compression explains how to apply it to one document or all new ones. Start with a big photo, too. At 300 dpi, a photo that spans the full 8.5 inch width needs about 2,550 pixels across.
Trap 3: color running to the edge leaves a white border. Most home and office printers can't print right to the edge of the paper. Either keep a white border on purpose, which looks clean and prints safely, or send the file to a print shop and ask for a full-bleed version. Word has no bleed setting, so the shop may want the file rebuilt on their template.
Step 8: Save as a PDF and print
Never send a .docx file to a printer or a coworker. Fonts swap, boxes shift and your layout breaks on someone else's computer. A PDF locks it in place.
On Windows: go to File, then Save a Copy (or Save As), choose a location, pick PDF in the file type list and select Save. Under More Options, then Options, you'll find Bitmap text when fonts may not be embedded. Turn that on if you used an unusual font, so the PDF still looks right.
On a Mac: go to File, then Save As, open File Format at the bottom of the window and choose PDF.
Open the PDF and check it before you print a stack: page size, sharp photos, nothing cut off, background color showing. Then print one copy, pin it on a wall and read it from six feet away. If you can't read the date, make it bigger.
Need two sides? Design the back on page 2 of the same document and save both pages in one PDF. Tell your print shop it's double-sided, or choose a two-sided option in your printer settings.
What printing your Word flyer costs
Printing at home costs you paper and ink. If you need a few hundred copies, a print shop is usually cheaper per sheet and much faster.
We checked published prices from 12 US online and national printers for our flyer cost study. The median price for 500 letter-size flyers was $147.50 before shipping, with a range of $110 to $210. For 100 flyers the median was $59.
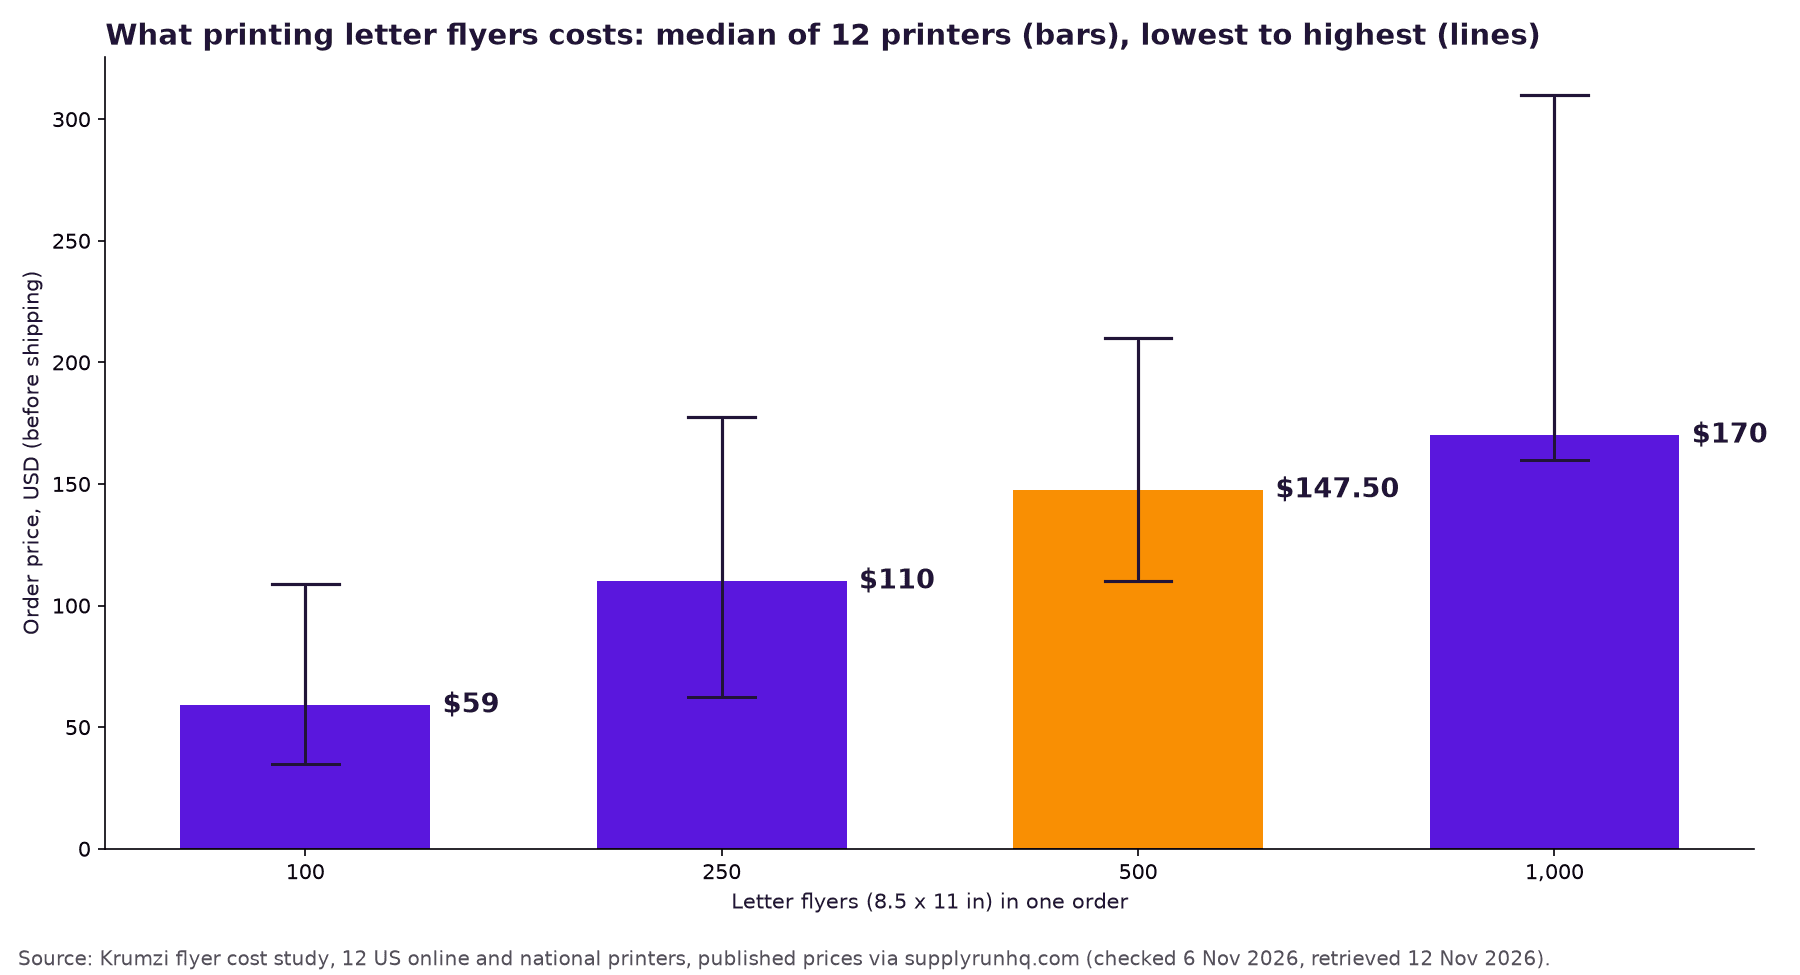
That's real money for a typo. Proof the PDF twice before you order.
Your Word flyer checklist
Copy this and run through it before you print:
- One message. A stranger gets the point in three seconds.
- A big headline. 48 pt or larger, readable from six feet.
- Three short details. What, when and where, nothing more.
- One call to action. One clear thing to do next.
- High contrast. Dark text on light, or white text on a dark block.
- Contact details checked twice. Phone, address, date and time.
- Background printing on, compression off. Trap 1 and Trap 2 handled.
- Saved as a PDF. Never a .docx.
When Word starts to fight you
Word handles one flyer fine. It struggles when the job grows.
You notice it when you need the same flyer in five versions, one per location or date, and each one means moving boxes by hand. You notice it when a print shop asks for bleed and crop marks. And you notice it when your template looks like every other flyer on the community board, because thousands of people picked the same one.
That's the point where a design tool saves time. If you'd rather describe the flyer than build it, Krumzi's free AI flyer maker designs a US Letter flyer from a sentence or two about your event, from scratch, in 1 to 3 minutes. You get one free flyer a week with no signup. Move, resize or retype anything, then download it with a watermark.
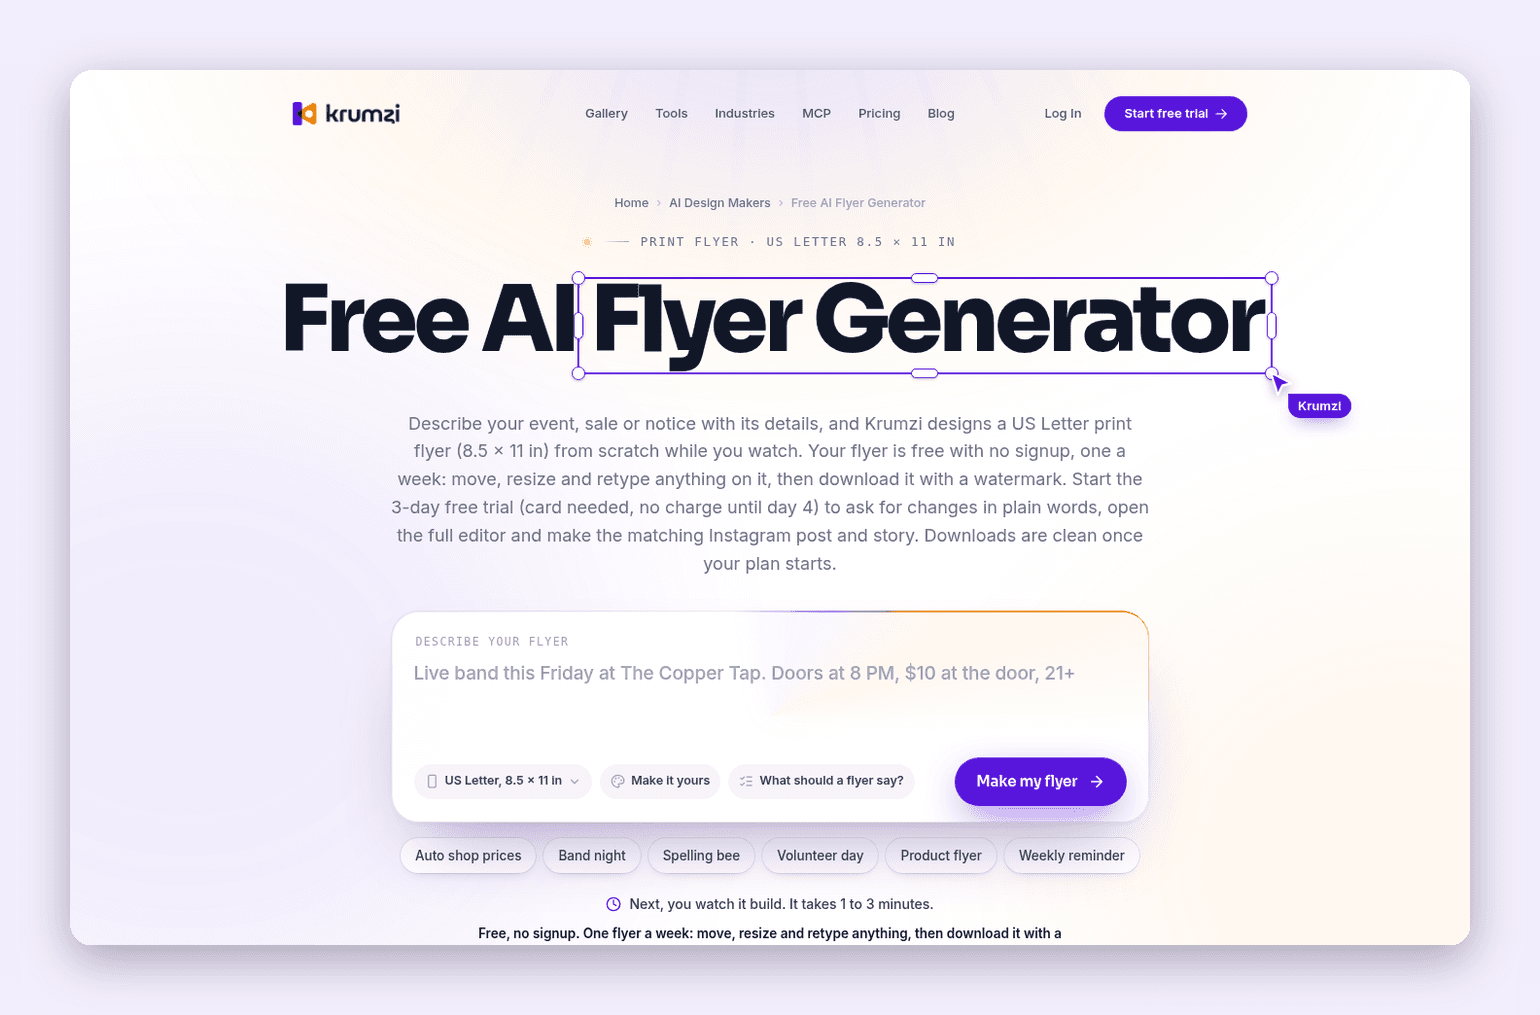
Every word on the design stays real, editable text, so changing the date for next month takes seconds instead of a redesign. Our guide to making a flyer with AI walks through the full process, from prompt to print.
Here's the honest limit: Krumzi is not Microsoft Word, and it won't open a .docx file. If you already have a Word flyer you like, save it as a PDF first. Krumzi can read a short PDF of up to four pages as a design reference, as its help article on attaching files explains, and design a fresh version from it. Your original Word file stays exactly as it was.
What it costs (Verified 19 Nov 2026 on krumzi.com/pricing):
- Starter: $19 a month, or $190 a year.
- Pro: $39 a month, or $390 a year.
- Studio: $89 a month, or $890 a year.
- Agency: custom pricing.
- Month pass: $49 once for 30 days of everything in Pro. Nothing renews, which suits a one-off event flyer.
Starter, Pro and Studio start with a 3-day free trial with 1,000 AI credits. A card is needed, nothing is charged until day 4, and trial downloads carry a watermark until your plan starts.
When you should use something else
Word is the right tool more often than design-tool companies admit. Here's how to choose:
- Stay in Word if you only need to swap the text on a template, or you're making one flyer for a notice board. You already own it, and the steps above get you a clean result.
- Use your print shop's template if you need full-bleed color, crop marks or an exact fold. Their template matches their trimming machine, which no general tool can promise.
- Use a design tool such as Canva or Adobe Express if you want a bigger template library and drag-and-drop layout, and you're happy to pick a template and fill it in.
- Hire a designer if the flyer carries your brand into a big campaign. In our flyer cost study, the median starting price across 75 Fiverr flyer-design gigs was $35, before revisions.
- Use an AI design tool if you need many versions quickly or don't want to build layouts at all.
Still weighing your options? Our roundup of the best AI flyer makers compares the leading tools side by side.
Your flyer, printed today
Pick your route: a template for speed or a blank page for control. Set Letter size and half-inch margins, keep to one headline and one call to action, then fix the three print traps and save a PDF. That's a flyer people can read, ready for the printer this afternoon.
Want the design part done for you? Start free trial and describe your first flyer.
3-day free trial, card needed. No charge until day 4. Cancel online anytime.
Frequently Asked Questions
Are there flyer templates in Word?
Yes. In desktop Word, go to File, then New, type "flyer" into the Search for online templates box and press Enter. Pick a design and select Create. Check the paper size under Layout, then Size, before you edit, because some templates use A4 instead of Letter.
How do I make a flyer in Word from scratch?
Open a blank document, set the size to Letter and the margins to 0.5 inch. Add your headline and details in text boxes from Insert, then Text Box, and add a picture from Insert, then Pictures. Set the picture's Layout Options so you can move it freely, then save the flyer as a PDF.
Why doesn't my background color print in Word?
Word skips page colors when printing unless you turn on one setting. On Windows, go to File, then Options, then Display, and select Print background colors and images. On a Mac, the same check box is under Word, then Preferences, then Print.
How do I make a two-sided flyer in Word?
Design the front on page 1 and the back on page 2 of the same document, then save both pages as one PDF. Choose a two-sided option in your printer settings, or tell your print shop the file is double-sided. Print one test copy first to check that the back isn't upside down.
What is the best format for a flyer?
A PDF is the best file format for printing a flyer, because it keeps your fonts and layout fixed on any computer. For the page itself, US Letter (8.5 x 11 inches) is the standard flyer size in the US. Use A4 or A5 in most other countries.
What is the easiest way to make a flyer?
The easiest way is to start from a template in a tool you already have, such as Word, and change only the words and photo. If you'd rather not build the layout at all, an AI flyer maker like Krumzi designs one from a short description. Either way, keep it to one headline, three details and one call to action.
A month of posts, designed before your coffee cools
Describe the post. Krumzi designs it from scratch, on your brand, fully editable.
Start free trial3-day free trial, card needed. No charge until day 4. Cancel online anytime.